

Pdf can be found on ravelry for a small fee https://www.ravelry.com/patterns/library/suspiciously-among-us
Materials needed
>category 4 worsted weight yarn
– About 50 yards of 6 different colors if making the
Rainbow or about 300 of 1 color
-50 yards of gray for the lens or your chosen color
-15 yards of black to surround the lense
-35 yards for the back pack and flower
>3.5mm/E hook for worsted yarn (or 2 full sizes smaller
than yarn recommends if using a different size yarn)
>tiny bit of white felt for the lens reflection
>a small amount of string to attach the reflection piece
>stitch marker (to mark first st of every
row)
>sharp scissors
>yarn needle
>pins (Optional but I strongly recommend
them. I use them to pin parts in place
before attaching.)
>stuffing
>yarn needle
Skills needed
>attaching parts/ limbs
>increase (crochet 2 in same st)
>decrease (crochet 2 together)
>increase (crochet 2 in same stitch)
>single crochet
>slip stitch
>double crochet
>sewing for the lens
Abbreviations
>*= repeat. If # of times not specified, then
repeat to end of row/round
>sc= single crochet
>dc= double crochet
>ch= chain
>b/o= bind off
>sl st= slip stitch
>mr= magic ring
>dec= decrease
>inc= increase
>st/sts= stitch/stitches
>dc2tog= double crochet 2 together
Notes:
>>If using a different size yarn, make sure to use a hook at least 2 full sizes smaller to avoid gaps.
>>When leaving a tail for attaching a piece, I cut my tail 3x the length of the piece being attached. This way, I know I have plenty and won’t run out.
>>Since we all have different tensions, some placement of the pieces may differ a bit.
>>join each row with a slip stitch for the entirety of this pattern, and ch1 to begin a new row.
>>In this pattern, the picot stitch will be worked in the following way. Chain 2, slip stitch into the 1sy chain.
>>I will include the pattern as if it were all done in 1 color, but will include where to color change as well. But this way, those who choose a single color, can access the entire pattern much easier. I will use a “C” followed by a number to indicate color change. Example, C1, C2, C3= color 1, color 2, color 3.
Let’s start crocheting!!!
Legs. make 2. If making character in single color, only b/o 1 of the legs. If changing colors, b/o both
- (C1) Mr 8sc
- *inc into every st* x8= 16sts
- *sc, inc* x8= 24sts
4-10) 24 sc each row. b/o and weave in tail

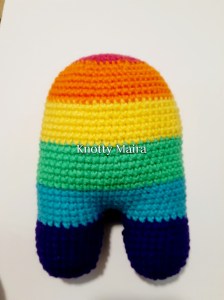
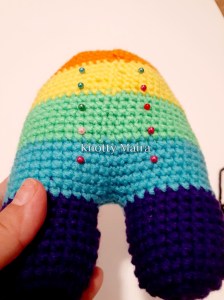
Body. Continuing from legs
>If working with a single color, ch4 from second leg and attach with a sl st to the other leg. If working in rainbow colors, attach next color to any leg, ch4, and sl st into the other leg.
11) (C2) after you have worked the ch4, the row will begin at the sl st. Work 24sc around the leg, 4sc into the chain, 24sc around the next leg, and 4sc into the other side of the ch= 56sts
12-33) 56sc each row. Start stuffing the
legs and the lower body
34) *5sc, dec* x8= 48sts
35) *4sc, dec* x8= 40sts
36) *3sc, dec* x8= 32sts. Stuff the rest of the body
37) *2sc, dec* x8= 24sts
38) *sc, dec* x8= 16sts. Finish stuffing
39) *dec* x8= 8sts. b/o leaving a tail to close up the hole. Weave in end once hole is closed.
>change to C3, C4, C5, C6 on the following rows for the rainbow pattern. Rows 17, 23, 29, 35
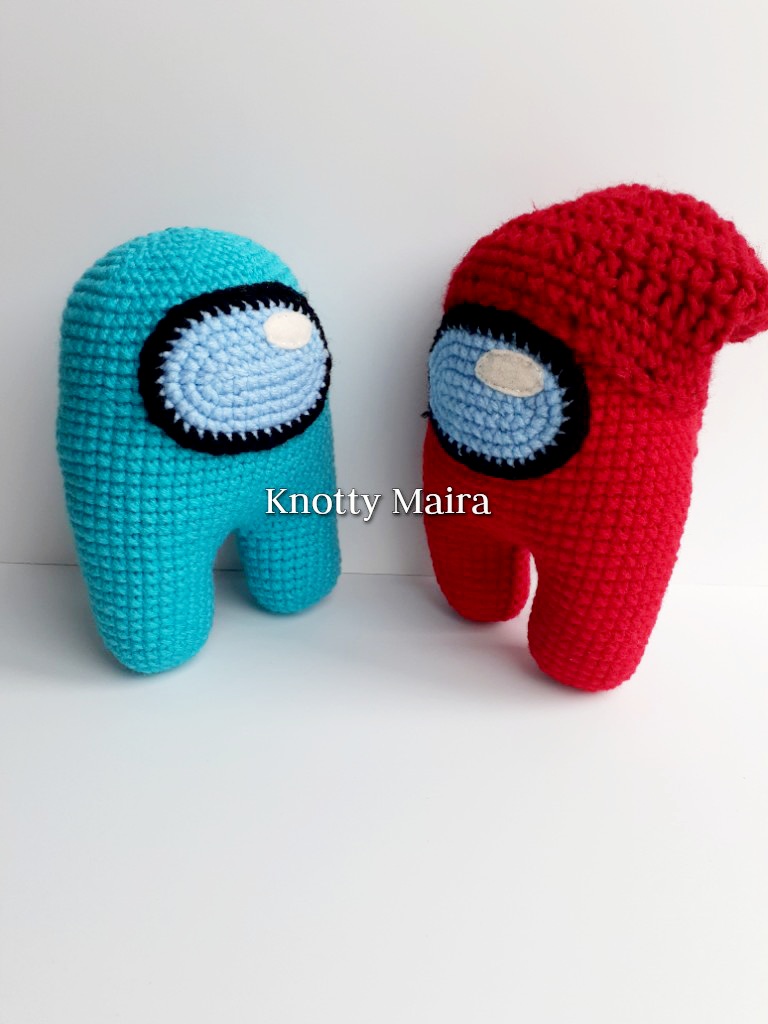
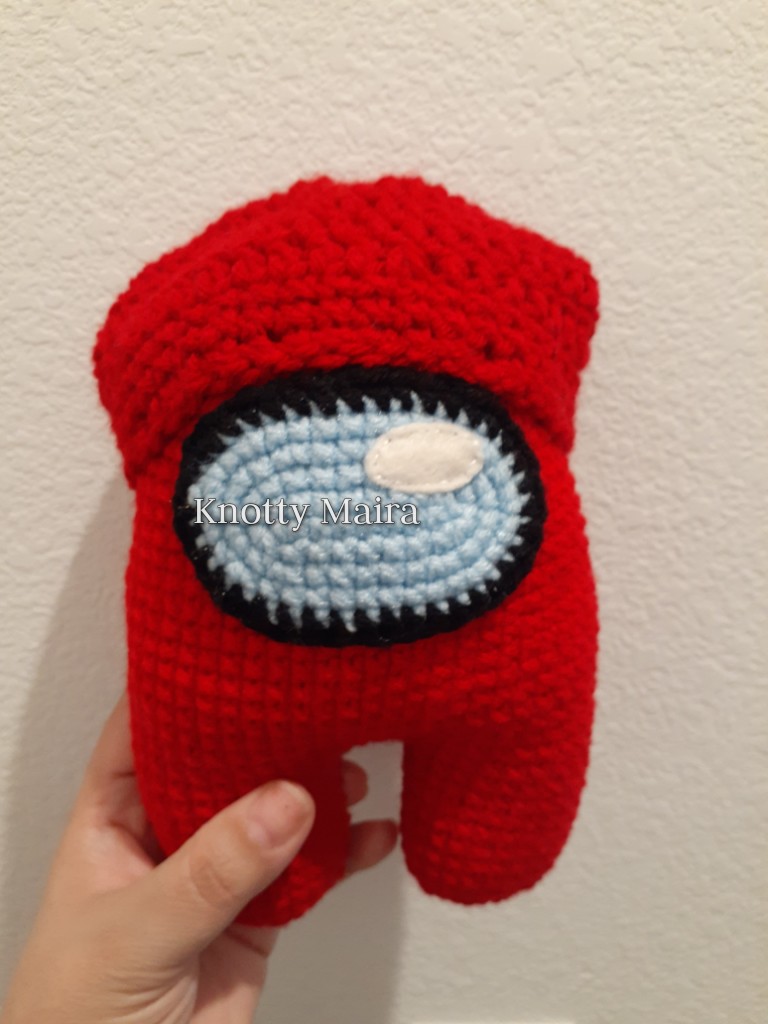
Lens.
- Starting in the 2nd chain from your hook 2sc in same st, 6sc, 3sc in same st, turn chain and 7sc. Last st will be in the same chain as the first 2sc.= 18sts
- 2sc in same st, 7sc, 2 sc in each of the next 2 sts, 7sc, 2sc in same st= 22sts
- 2sc in same st, sc, 2sc in same st, 5sc, 2sc in same st, sc, 2sc in each of the next 2 sts, sc, 2sc in same, 5sc, 2sc in same st, sc, 2sc in same st= 30sts
- *2sc in same st, sc* x2, 7sc, *sc, 2sc in same st* x2, *2sc in same st, sc* x2, 7sc, *sc, 2sc in same st* x2= 38sts b/o and weave in tail
- Attach black yarn on to any stitch. Ch 1, and loosley work 38sc. b/o leaving a tail long enough to attach
>Cut an oval from your felt and sew on to the lens. Please refer to the picture. Attach between rows 20 and 30.
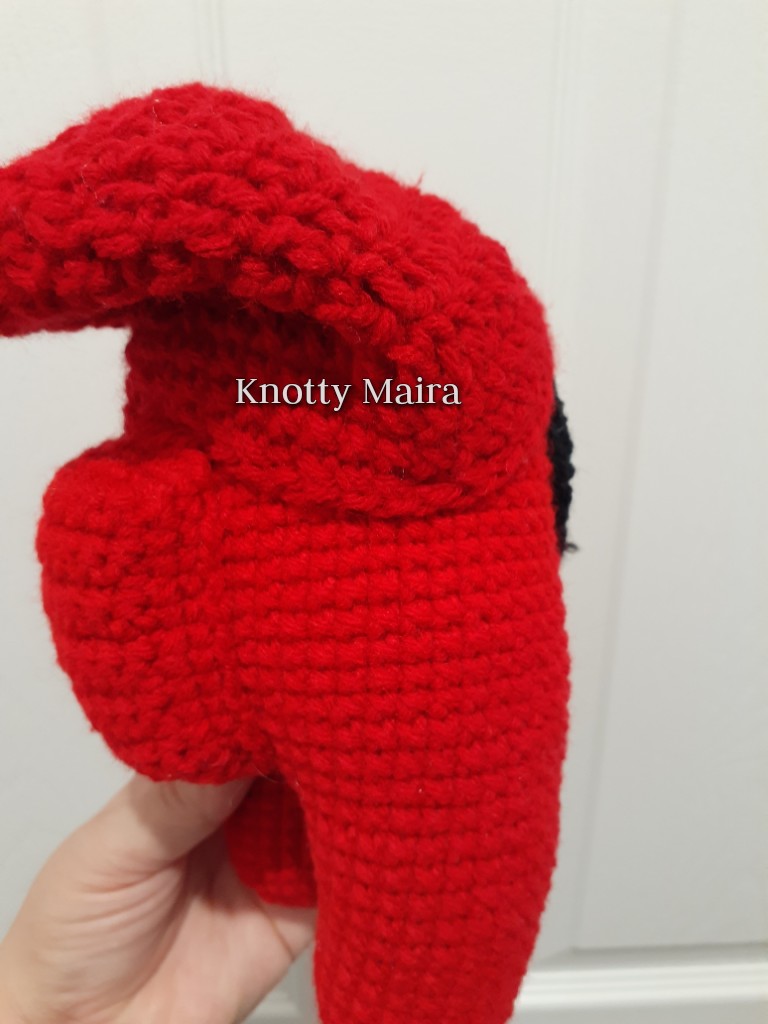
Back Pack. You will be working back and forth and not around the chain. Don’t forget to chain 1 and turn to start a new row
- 12sc
2-13) 12 sc each row
>we will not be working around this rectangle. Turn your rectangle clockwise
12) turn your work to the side, sl st 1 to move over 1 space and work 12 sc, turn the corner and work 12sc, turn the corner again and work 13 sc, turn the corner once more and work 12sc, turn once more and work 1 sc= 50sts
13-14) 50sc each row. b/o leaving a tail long enough to attach
> Attach to the back between rows 13 and 27, making sure it is centered. Stuff before you are done with the final sts. I like to use pins to mark where I will be attaching. Please refer to the picture.
Flower
- In yellow mr 12sc. b/o leaving a tail for attaching
- Attach your white yarn. *ch1+ hdc+ pcs all in the same st, hdc+ sl st in the same st, sl st into the next st* repeat this a total of 6 times to create 6 pedals. b/o weave in tail.
> with the yellow tail, attach on to the top of the head, along the yellow sts of the flower.

Hat. use a 5mm/H hook
>>Starting with a long tail that will be used for attaching later, ch42 and sl st both ends together to form a circle. Be careful not to twist your chain
1-3) sc 42 each row. Next rows will be dc so make sure to ch 2 to begin. This ch2 counts as your 1st stitch
4) *8dc, dc2tog* x4, 2dc= 38sts
5-8) 38dc each row
9) *2dc, dc2tog* x9, 2dc= 29sts
10) *dc, dc2tog* x9, 2dc= 20sts
11) *dc2tog* x9, 2dc= 11sts
>>b/o leaving a tail long enough to close the hole. Attach hat right above the lens and back pack but bring sides down lower into the 25th rows
And that is it. you are done! Just fix the hat into position. Hope you enjoyed this amigurumi !!
